1. Open iDVD
2. When the iDVD startup screen appears, choose "Create a New Project".
3. In the "Create Project" dialog, name your project and choose a location to store it. Also note the Standard/Widescreen selection. Make sure that "Widescreen" is selected.
4. iDVD will open up your new project with the default theme. You can change the default theme under the "Themes" tab, but for this example I am going to use the default theme "Revolution Main".
5. Go to the bottom left-hand corner and click on the "+" icon>Add Slideshow
6. A new button will show up underneath the "Revolution Main" header.
7. To put photos into the slideshow, switch to the "Media" tab in the bottom left-hand corner.
8. In the Media tab, go to the "Photos" tab.
9. Navigate to your photos and select the ones you want in your slideshow.
10. Drag and drop the photos into the slideshow.
11. Down in the bottom right-hand corner, click on "Transition" and select the one that you want. For this tutorial, I have selected "Dissolve" Unfortunately, iDVD does not have a random transition feature.
12. In the same corner, click on the "Slide Duration" menu and select the time that you want each picture to appear. You can also select "Fit to Audio", if you have an audio track. See the next step on how to add music to your slideshow.
13. In the "Media" tab, click on "Music". Your iTunes library will appear in the browser.
14. Drag and drop the tracks that you want in your slideshow at the very top of all the photos. Make sure that you drop the music at the top of the photos, otherwise that music will not play for all the photos.
15. Down at the bottom of the screen next to the slideshow settings, click the "Return" button. This should take you back to the DVD menu.
16. You can drag pictures from the "Media" browser on the left to the drop zones in the menu.
17. To change the main title of the DVD menu, double-click the title "Revolution Main" and enter your own title.
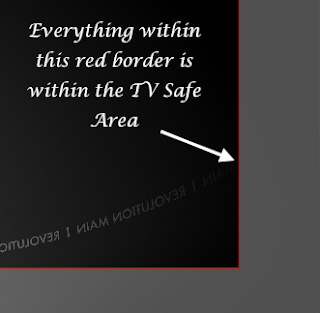
18. A useful tool is the TV Safe Area. Go the View menu>Show TV Safe Area. The TV Safe Area is the area that you can safely place content without accidentally cutting off some of the content.
19. You are done! To burn your DVD, go to File>Burn DVD… Insert a DVD when iDVD prompts for one, and wait about an hour for the DVD to render and burn.


No comments:
Post a Comment